This is a re-print of my original post on blogWIP.com. At the end of this post I note some changes I had to make to this re-post to get the same results.
So, you are writing a Post in WordPress and are including an image that isn’t yours and doing so requires that you include the proper credits and, possibly, a link. Or maybe it is yours and you want to include your photo credit / copyright . Well this can be difficult within WordPress if you are using the standard image manager and trying to add a link within the caption. This is because WordPress strips out any HTML code within the caption. Why are they doing this? My guess is because the “Caption” also is being used as the value for the image’s “alt” text and, as such, cannot include other HTML element tags. It would be nice if WordPress only stripped out the HTML code from the “alt” attribute and left it for the caption below the image but….
Have you figured out how to include a linked caption? Have you tried to find a plugin to help with this? Had any luck? If so, let me know. If not, don’t worry, you’re not alone. So, what can a non-developer do? This post covers one solution that isn’t the most elegant but it gets the job done. In subsequent posts I’ll discuss other options and image sources.
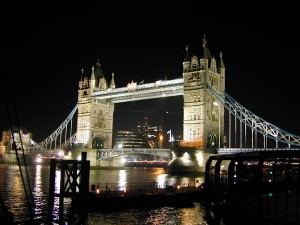
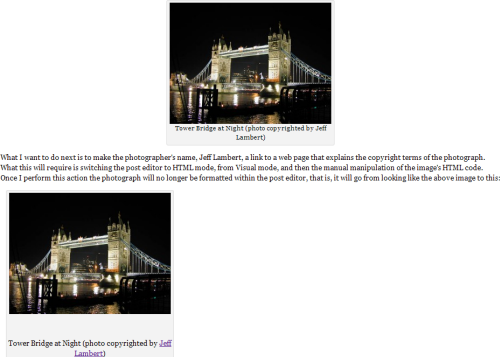
The first step in the process is the one you are use to, use the <Add an Image> button like you always do. The only difference is that you’ll put in the copyright or other image credit text in the “Caption” field along with any caption text you want. Here’s an image that I’ve inserted as centered and medium in size along with the full caption that I want.
What I want to do next is to make the photographer’s name, Jeff Lambert, a link to a web page that explains the copyright terms of the photograph. What this will require is switching the post editor from Visual mode to HTML mode followed by the manual manipulation of the image’s HTML code. Once I perform this action the photograph will no longer be formatted and positioned within the post editor, that is, it will go from looking like the above image to the one below:
As such, you’ll want to fully complete your post, including the insertion of images positioned as you’d like them, before you update the photo’s HTML code to update the caption. That way you can tell if things look okay from a positional, sizing perspective.
Manipulating the HTML
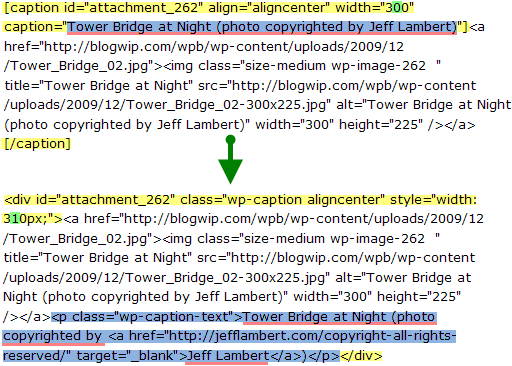
The following shows what you will see within the HTML view of the post once you insert an image and how you need to adjust it to add a link to a portion of the text:
Essentially, what you are doing is what the WordPress code behind the scenes is doing when it processes an image within the post’s text that is encapsulated by tags. To prove this, do a preview of the post and then look for the image within the pages Source. You should find something quite similar if not the same as what we are changing the code to within the HTML editor. One item of note is that you’ll change the width reference in the outer <div> element to add 10 to it. So, in the example here, I changed 300 to 310.
To further clean this caption up, I pushed the copyright line down to a second line and also made it slightly smaller than the caption text by adding the following HTML between the first line and second line of text:
The resulting image will look as follows:
Of course, my example shows how to center align an image with a linked caption. What happens if you want to position it to the right or left? Well, it’s pretty simple. Just change any position word to the desired position.
This image is on the left. I also scaled it down 70%. This meant that I needed to do two things after inserting the image and adjusting it as I did above. First, I used the image edit button (hover over the image and click the picture button) to select the 70% size from the image size scale. This updated the size of the image in the HTML view. I checked to see what this changed to, added 10 and then updated the outer <div> width to this new value, in this case, 220px. The outer <div> class also reads class=“wp-caption alignleft” instead of class=”wp-caption aligncenter”.
To position the image on the right it was as simple as changing the class to class=”wp-caption alignright”.
The one thing I did find when putting an image at the end like this is that the author box would slip under the image, so, I simply added some extra lines to the end of the text to push things down.
In re-printing this Post on this website I found that the theme I’m using here threw some wrenches into the mix. Most notably was that the captions on the left and right aligned images also had the text aligned to the same side. Pretty bad when you are dealing with captions. Also, the padding around the paragraphs of the wp-caption’d div’s were different in this theme than they were in the WordPress theme I used for blogWIP.com. The fix for this was fairly simple and I decided to apply it to the CSS stylesheet as it was applicable across the website. The following is what I added:
.wp-caption p, .wp-caption p.wp-caption-text {
    text-align: center;
    font-size: 0.8em;
    margin: 0;
    padding: 0;
}
Moral of the story, as with most articles that instruct you on how to perform a certain task, you will need to make adjustments.
Best of luck


